ridgewing guitars

Making a silicone mold is actually pretty fun. Everything is clean. You get to play with clay and make a pretty box and be technically clever all at the same time, essentially creating a mechanically precise mother who will subsequently make precisely shaped children that you can sell. Not bad.
The Ridgewing headstock is comprised of three major molded components – the headstock body, a string “mount”, and the string tensioning lever. This mold is especially cool because it will make all three components at once. It looks like there are two cavities for headstock mounts on the left, I guess because there was room and why not? The lever is on the right.
The central grey headstock body model, or “plug” as it is called in the molding world, was 3D-printed from a CAD file and then hand-sanded and polished, as was the headstock mount. The tensioning lever model was rendered in clear plastic, then polished up the same way. It is a good investment to spend time finishing out the models to the smallest details, because the silicone molding process reproduces surface textures down to sub-micron levels. It is really nice to take a finished part out of a mold and just have to pick off a bit of flash and then rub-a-dub-dub the surface to a satin sheen, and be done.
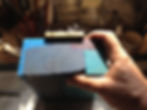
Once the mold box is made, the process starts with filling it about half way with sulfur-free artist’s clay. The various components are carefully embedded in the clay up to approximately half their thickness, and a clean "parting line" is created around the boundary of each.
The two big chrome round-head nuts are used to create registration features so when the two halves of the mold are closed to make a set of parts, the two halves of each component cavity in the mold will line up precisely to within a few tens of microns. The greenish yellow lines are pieces of thick brass wire that will leave hollow “vias” where excess epoxy can flow after the mold box is filled and closed. It is startling the precision that can be achieved with such free-form materials and procedures.
Before the top half of the mold is poured, the mixed silicone has to be "de-gassed". This degassing procedure is actually a fun bit of real rocket science. The mixed silicone is put into a sturdy sealed chamber with a thick Plexiglas lid so you get to watch as a high vacuum is drawn down, and a pretty interesting process unfolds. In all molding, the great enemy is bubbles. A bubble on a mold surface will create a corresponding bump on the finished part that will have to be filed off every part made, which is not allowed, so instead, you toss the mold with the bubble and start making a new one. Getting rid of all bubbles by any means necessary is absolutely essential.
As the pressure is drawn down, any bubbles in the silicone, down to microscopic size, begin to expand and billow up in a writhing green foam. After reaching maximum vacuum, it takes a few minutes for the silicone’s bubbling surface to subside, indicating all bubbles are out. Air is let back into the vacuum chamber, and the now bubble-free liquid silicone is ready to take out and pour.
With all the required features in their proper places in the mold box and the lid properly closed and secured, the silicone is very slowly poured into the mold through the hole visible in the upper right corner of the mold box. After it is full, it is left to harden overnight. Any stray bubbles that may have formed during the molding process will hopefully float up away from the mold surfaces.
After the silicone has hardened, the mold box is opened, and the silicone slab and the various components are removed. Then the clay is all taken out and the mold box is turned upside down. The various components are carefully fitted into their cavities on the new silicone side, and a fresh batch of silicone is poured in to fill the bottom of the mold. When the silicone is fully cured, the mold box is opened, the two silicone halves are separated, and all the various components are removed. The mold is now ready to make parts.
In contrast to the clean two-part mold for the headstock, parts with complex geometries can require some really funky multi-part molds. This mold was created to make wax patterns of the Ridgewing bridge for investment casting. The bridge design has a lot of undercuts, and the wax is fragile, so the mold had to be made in a number of steps. Here the mold required four pours, each of a different color, and instead of a mold box, this is held together with rubber bands.
After the hot wax is poured into the mold, it hardens fairly quickly. The various parts of the mold are carefully disassembled, and the anticipation grows.

If you are lucky, you experience that magic feeling you had back in your childhood while unwrapping a very special Christmas present, and something delicate and beautiful emerged.


Making Molds
2017-02-03